Recording audio on an Android phone is something people do for dozens of different reasons — capturing a lecture or meeting, recording a voice memo before the thought slips away, laying down a song idea, archiving an interview, capturing ambient sound for a podcast or video project, or simply making a backup of a phone call for your own reference. Android’s flexible, open architecture makes it one of the best mobile platforms for audio work, with solid built-in tools on most devices and an enormous ecosystem of specialized third-party apps for more demanding use cases.
The challenge is that “recording audio on Android” is not a single, unified experience. Different manufacturers implement audio recording features differently. Samsung has its own Voice Recorder app with multiple recording modes. Google Pixel phones have the Recorder app, which adds real-time transcription. Most other Android phones have some kind of built-in recorder, but it varies in capability. And then there is internal audio — capturing sound from within the phone itself, like game audio or music — which works through a completely different mechanism than external microphone recording.
This guide covers four distinct audio recording scenarios and the best approach for each: recording external audio around you using the built-in voice recorder, capturing internal audio from the phone’s system using the screen recorder, using a dedicated third-party app for professional-quality recordings, and connecting an external microphone for the highest possible audio quality. We also cover practical tips for better recording quality that apply across all methods, and address how parents can use related features to monitor the environment around their child’s phone for safety purposes.
By the end, you will know exactly which method fits your recording scenario and have step-by-step instructions to implement it.
Does Android Have a Built-In Voice Recorder?
Yes — almost every Android phone comes with a built-in voice recorder app, though the name, interface, and capabilities vary by manufacturer.
On Samsung Galaxy devices, the app is called Voice Recorder and comes pre-installed. It offers multiple recording modes and can save files at up to 256kbps audio quality.
On Google Pixel devices, the app is called Recorder and is one of the most capable built-in options available, with real-time speech-to-text transcription, searchable recordings, and the ability to capture up to 18 hours of continuous audio.
On devices from other manufacturers — OnePlus, Xiaomi, Motorola, Nokia, and others — the built-in recorder varies in name and features. On devices that lack a built-in recorder or have one with limited features, the Google Recorder app is available for download on the Google Play Store and provides a high-quality baseline experience.
Built-in voice recorders on Android are generally:
- Free to use with no subscription required
- Capable of saving recordings to internal storage or an SD card
- Able to export recordings for sharing
- Usable for basic trimming and organization of recorded files
For most everyday recording needs — voice memos, lectures, meetings, interviews — the built-in app is sufficient. For professional or creative audio work, the third-party and external microphone methods covered later in this guide provide meaningfully better results.
Method 1: Record External Audio Using the Built-In Voice Recorder
Recording external audio — sounds in the environment around you, your own voice, or a conversation happening in the same room — is what most people mean when they ask about recording audio on Android. Here is how to do it on the two most common device types.
Samsung Galaxy Devices — Voice Recorder App
Samsung’s Voice Recorder app is one of the most fully featured built-in recorders on any Android phone. It offers three distinct recording modes that make it useful across a wider range of scenarios than a basic record-and-stop interface.
Standard mode is designed for general recording — voice memos, ambient sound, anything where you simply need to capture what is happening around the phone. The audio is saved as an M4A file.
Interview mode uses both the front and rear microphones simultaneously, making it ideal for capturing two-person conversations where the speakers are on opposite sides of the phone. The phone is placed between the two speakers, and both voices are captured with reasonable separation.
Speech-to-text mode processes your voice recording in real time and produces a text transcript instead of (or alongside) an audio file. This is useful for quick voice notes that you want searchable or shareable as text.
How to use Samsung Voice Recorder:
Step 1: Open the Voice Recorder app. If you cannot find it in your app drawer, swipe down from the top of the screen and search “Voice Recorder” in the Samsung search, or check Settings > Apps to confirm it is installed.
Step 2: From the main interface, tap on the recording mode selector at the bottom — you will see the three mode options. Tap the mode you want to use for the current recording.
Step 3: To adjust recording quality before starting, tap the three-dot menu in the upper-right corner and go to Settings. Here you can set the audio format (MP3, M4A, or WAV) and recording quality up to 256kbps at 48kHz — which is the highest quality available and appropriate for any situation where audio quality matters.
Step 4: Tap the red record button to begin. The app will display a timer and a waveform, showing that audio is being captured.
Step 5: Tap the pause button to temporarily stop recording without ending the session — useful for multi-part recordings like an interview with breaks. Tap stop to end and save the recording.
Step 6: Saved recordings appear in a list within the Voice Recorder app, organized by date. Tap any recording to play it, share it, rename it, or trim it. You can also access recordings as audio files through My Files > Internal Storage > Recordings > Voice Recorder.
Tip: For best results in Samsung Voice Recorder’s Standard mode, hold the phone with the microphone (located at the bottom of the device) facing toward the sound source, and try to reduce background noise by moving away from fans, air conditioning, traffic, or other continuous sound sources.
Google Pixel Devices — Recorder App
Google’s Recorder app, exclusive to Pixel phones, offers a significantly more capable experience than most built-in recorders — particularly because of its real-time transcription feature, which converts speech to searchable text automatically as you record.
Key capabilities of the Pixel Recorder app:
- Up to 18 hours of continuous recording — significantly longer than most competing apps
- Real-time transcription — spoken words are converted to text as they are captured, making recordings searchable
- Searchable history — you can search the text transcripts of all past recordings to find specific conversations or topics
- Speaker labels — in conversations with multiple speakers, the app attempts to label different voices separately in the transcript
- Automatic saving — recordings are saved to Google Drive automatically if connected
How to use Google Pixel Recorder:
Step 1: Find and open the Recorder app on your Pixel device. It is typically located in the app drawer or can be accessed by saying “Hey Google, open Recorder.”
Step 2: Tap the large record button (microphone icon) at the bottom of the screen. Recording begins immediately.
Step 3: The screen will display a live waveform visualization as audio is captured. If the person speaking is using standard English, the transcript will begin to appear in real time below the waveform.
Step 4: Tap the pause button at any time to temporarily stop without ending the session. This is useful for long meetings or lectures where there are natural breaks.
Step 5: When finished, tap pause and then save the recording. You can rename it and add a location tag before saving.
Step 6: All saved recordings are accessible in the main Recorder interface, searchable by transcript content. Tap any recording to play it back with the synchronized transcript displayed alongside the audio.
For non-Pixel Android devices: The Google Recorder app is available on the Google Play Store for broader Android compatibility, though some advanced features (like transcription) may have reduced functionality on non-Pixel hardware.
Method 2: Record Internal Audio Using the Screen Recorder
Internal audio recording — capturing sound that originates from within the phone itself, such as music, game audio, video soundtracks, or notification sounds — works differently from microphone recording and requires a different approach.
Android does not allow internal audio recording directly through third-party apps in most configurations, due to privacy restrictions introduced in Android 10. However, the system-level screen recorder bypasses this limitation because it operates with elevated system permissions that third-party apps do not have. The screen recorder can simultaneously capture screen content and internal audio — which includes all sound playing through the phone’s speaker system.
Important caveat: The screen recorder captures internal audio only for apps that do not explicitly block recording. Streaming services like Netflix, Spotify (in certain modes), and some banking apps may block audio capture at the app level, resulting in silent recordings. This is a copyright and security protection implemented by those apps, not a limitation of Android.
How to Use the Android Screen Recorder for Internal Audio
Step 1: Navigate to the screen or app whose audio you want to capture — start the music, launch the game, or get to the relevant part of the video before beginning the recording.
Step 2: Swipe down from the top of the screen twice (or swipe with two fingers) to open the Quick Settings panel.
Step 3: Look for the Screen Recorder tile. If you do not see it, tap the pencil/edit icon to customize your Quick Settings panel and drag Screen Recorder into the active tile area.
Step 4: Tap the Screen Recorder tile. A configuration prompt will appear asking about audio settings. Select Device audio or Device audio and microphone depending on whether you also want to capture your own voice alongside the internal audio.
Step 5: Tap Start. A brief countdown appears before recording begins. The screen and all internal audio will now be captured.
Step 6: When finished, pull down the notification shade and tap Stop Recording. The recording will be saved to your Gallery or a Screen Recordings folder in your device’s internal storage.
Extracting audio from the video file: If you need just the audio (not the video) from a screen recording, you can use a free audio extraction tool or app. VLC for Android can play and convert media files, and the Video to MP3 Converter app on the Play Store allows you to extract audio tracks from video files directly on your phone.
Method 3: Record Audio with a Third-Party Voice Recorder App
For users who need more control over recording quality, file management, or specialized features — podcasters, journalists, musicians, field researchers, students recording long lectures — a dedicated third-party voice recorder app provides capabilities that the built-in tools simply do not offer.
Smart Voice Recorder
Smart Voice Recorder is one of the most consistently well-reviewed audio recording apps on the Google Play Store, with a focus on long-duration recording without quality degradation. It is designed for recording sessions that may run for hours — lectures, conferences, long interviews — where the built-in recorder’s simplicity is an advantage but its feature limits become frustrating.
Key features:
- Automatic pause on silence: The app can detect when audio falls below a set threshold and pause recording automatically, resuming when sound returns. This keeps recordings focused on relevant content and significantly reduces file size for recordings with long quiet periods.
- High-quality audio capture: Supports recording at up to 44.1kHz sample rate with high bitrate settings, producing near-CD-quality audio when device hardware allows.
- Visual audio level meter: Real-time meter shows audio input levels, helping you position the phone correctly and identify clipping (distortion from audio being too loud).
- Skip silence on playback: When reviewing a long recording, you can enable playback that automatically skips silent sections, jumping directly to the next stretch of spoken content.
- Multiple format support: Records in AMR, 3GP, and other formats depending on Android version and device capability.
How to use Smart Voice Recorder:
Step 1: Open the Google Play Store and search for Smart Voice Recorder. Install the app by developer Andrwq.
Step 2: When the app opens for the first time, grant the microphone and storage permissions it requests. These are required for the app to function.
Step 3: Before recording, tap the settings icon (gear) to configure your preferred recording quality. For voice recordings, a sample rate of 44.1kHz with high bitrate is a good default. For voice memos where file size matters more than quality, lower settings work fine.
Step 4: Enable Auto-pause on silence in settings if you are recording a lecture or meeting where there will be extended quiet periods.
Step 5: Return to the main screen and tap the large red record button to begin. The waveform display will show incoming audio levels in real time.
Step 6: Tap pause to temporarily halt recording and resume to continue. Tap stop when the session is complete. The recording is saved to the app’s library and accessible as an audio file on your device.
Other Worthy Third-Party Recording Apps
Dolby On is a free recording app developed by Dolby Laboratories that applies real-time audio enhancement — noise reduction, dynamic range processing, stereo widening — to improve the quality of recordings made through your phone’s built-in microphone. It is particularly effective for improving recordings in imperfect environments.
Hi-Q MP3 Voice Recorder is designed specifically for capturing voice at the highest quality your Android device supports, outputting directly to MP3 format. It is popular among journalists and podcasters for its clean interface and consistent high-quality output.
Easy Voice Recorder offers a clean, minimalist interface and straightforward file management. A good choice if you primarily need reliable voice memo functionality without the complexity of professional recording tools.
Method 4: Record Audio with an External Microphone
For the highest possible audio quality — professional podcast production, music recording, journalism, ASMR content, or any situation where the phone’s built-in microphone is a limiting factor — connecting a dedicated external microphone to your Android device delivers a step-change improvement.
External microphones designed for smartphones typically connect through one of three interfaces: the 3.5mm headphone/microphone jack, USB-C, or Bluetooth. Each has different trade-offs in terms of quality, latency, and convenience.
Choosing the Right External Microphone
3.5mm TRRS microphones are designed for devices with a combined headphone and microphone jack (the TRRS — Tip, Ring, Ring, Sleeve — connector standard). Many lavalier (clip-on) microphones use this connector. If your Android device has a 3.5mm jack and supports microphone input through it, a TRRS microphone is the simplest plug-and-play option. Note: Many newer Android devices no longer include a 3.5mm jack, requiring a USB-C to 3.5mm adapter — verify that the adapter passes microphone audio (not all do).
USB-C microphones connect directly to the USB-C port and generally deliver higher audio quality than 3.5mm options because the analog-to-digital conversion happens in the microphone itself rather than in the phone’s audio hardware. Well-regarded USB-C options for Android include the Rode Wireless GO II (for wireless clip-on recording) and the Shure MV88+ for directional recording.
Bluetooth microphones offer wireless freedom but introduce latency — a delay between when sound is captured and when it is recorded. For voice memos and interviews, this latency is usually acceptable. For music performance or video where audio must be perfectly synchronized with visuals, wired connections are preferable.
How to Set Up and Use an External Microphone on Android
Step 1: Verify compatibility. Before purchasing, confirm that your specific Android device supports external microphone input through the connection type you are using. USB-C audio input requires the device to support USB Audio Class — most Android 5.0+ devices do. For 3.5mm, look for “TRRS” in the microphone’s specifications to confirm it is designed for combined audio/mic jacks. Some devices require a specific adapter type; check the product’s Android compatibility information carefully.
Step 2: Connect the microphone. Plug the 3.5mm TRRS connector into your phone’s headphone jack, or insert the USB-C connector into the USB-C port. For Bluetooth microphones, pair the microphone through Settings > Bluetooth before recording. Allow a few seconds after connecting for the system to recognize the new audio input device.
Step 3: Open your recording app. Most recording apps will automatically detect a connected external microphone and switch to it as the audio input source. If this does not happen automatically, check the app’s settings for an audio input or microphone source selection. Smart Voice Recorder and most professional recording apps include explicit microphone source selection in their settings menu.
Step 4: Test before recording. Do a short test recording of 15 to 30 seconds and play it back to confirm the external microphone is being used. The quality difference versus the built-in microphone should be immediately audible — external mics typically produce fuller, warmer sound with noticeably less background noise. If you still hear the quality of the built-in microphone in the playback, the app may not be routing to the external source — try a different app or check the physical connection.
Step 5: Position the microphone correctly. For directional (cardioid) microphones, point the front face toward the sound source. For lavalier microphones, clip to the collar or lapel approximately 6 to 8 inches below the chin and route the cable inside the clothing if possible to reduce cable handling noise. For stereo microphones, position according to the manufacturer’s instructions for your specific recording situation — stereo mics typically have an optimal distance and angle for best channel separation.
Step 6: Monitor while recording. If your external microphone setup includes a headphone monitoring output — common on USB-C and professional 3.5mm adapters — use it to listen to your recording in real time and catch any issues (wind noise, handling noise, clipping) before they ruin a long take. Real-time monitoring is one of the biggest workflow advantages of using a proper audio interface or monitoring-capable microphone over the built-in mic.
Step 7: Manage wind and handling noise. If recording outdoors or in any environment with air movement, use a windscreen or dead cat (foam or furry cover) over the microphone capsule. Wind noise is almost impossible to remove cleanly in post-production — prevention is the only reliable solution. Similarly, try to minimize handling of the phone or microphone during recording, as these vibrations are easily picked up and appear as thumps or rumbles in the recording.
Tips for High-Quality Audio Recordings on Android
Regardless of which recording method you use, these practices consistently improve the quality of your results.
Choose a Quiet Recording Environment
Background noise is the single biggest factor separating a clear, professional-sounding recording from a muddy, distracting one. The phone’s microphone (and most external microphones) captures everything within range — heating and air conditioning systems, traffic, computer fans, nearby conversations, and the ambient hum of electrical equipment. Before recording, take a moment to identify noise sources in your environment and either turn them off or move away from them.
For regular recording needs, finding a room with soft furnishings — carpet, curtains, upholstered furniture — makes a significant difference. Soft surfaces absorb reflections that cause recordings to sound hollow or echoey. Hard-walled rooms (kitchens, bathrooms, bare offices) produce noticeably worse recordings than carpeted rooms with furniture.
Position the Microphone Correctly
Distance from the microphone is one of the most immediately impactful variables in voice recording quality. For the phone’s built-in microphone (located at the bottom of most Android phones), aim to keep your mouth approximately 6 to 12 inches from the bottom of the device. Closer produces a fuller, warmer voice sound; further produces a thinner, more ambient sound.
For external microphones, follow the microphone’s specific guidance — different pickup patterns require different placement. A cardioid condenser microphone placed directly in front of the speaker at 6 to 8 inches produces excellent results for voice work.
Adjust App Settings for Your Use Case
Most recording apps offer settings that affect output quality significantly. The key parameters are:
Sample rate — typically 44.1kHz (CD quality) or 48kHz (broadcast quality). Higher is better, though the difference is subtle for voice recordings.
Bitrate — higher bitrate means more data captured per second and therefore better audio quality, at the cost of larger file sizes. For voice recordings that will be shared or edited, 128kbps MP3 is a practical minimum; 256kbps is preferable.
Audio format — WAV and FLAC are lossless (no quality loss from compression) and produce larger files. MP3 and M4A/AAC are compressed (smaller files, slight quality reduction). For editing and professional work, WAV is preferred. For voice memos and sharing, M4A is a practical default.
Monitor Recording Levels
If your recording app shows a level meter (a moving bar showing input volume), pay attention to it before and during recording. The meter should be moving in the medium-high range — above 50% but not reaching the top. If the meter consistently hits the maximum (often shown in red), the recording will clip — producing distortion that cannot be removed in post-production. Move further from the microphone or lower the input gain if clipping occurs.
Speak Deliberately and Project Your Voice
For voice recordings specifically, speaking with clear enunciation, a measured pace, and a projected voice significantly improves recording clarity. Mumbling, trailing off at the end of sentences, or speaking too quickly all reduce the intelligibility of a recording. If you are recording a voice memo or note that you will later transcribe, consider speaking more slowly and deliberately than feels natural — the extra care is immediately apparent in playback quality.
Back Up Important Recordings
Audio files stored only on your phone are one dropped device, one accidental factory reset, or one storage failure away from being permanently lost. Any recording that matters should be backed up immediately after creation. Google Drive, Google Photos (which can store audio files in addition to photos), Dropbox, or a direct transfer to your computer all provide reliable backup options.
Bonus: Monitoring the Live Surroundings of Your Child’s Phone
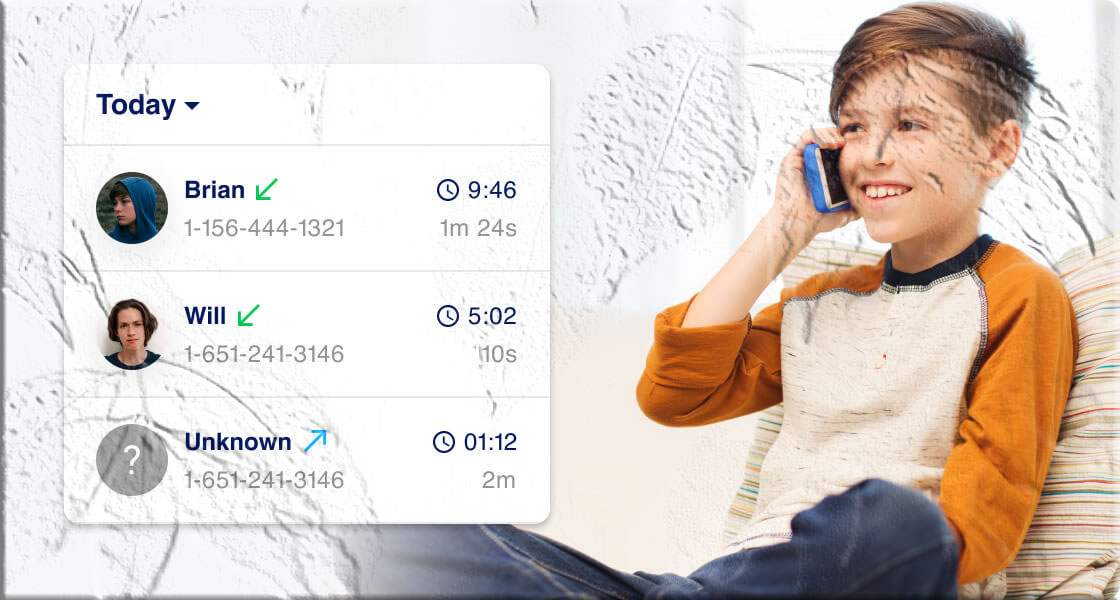
A related use case that parents frequently ask about is listening to the live environment around their child’s phone — not recording audio for content purposes, but for safety monitoring to ensure children are in safe situations when they are not within sight.
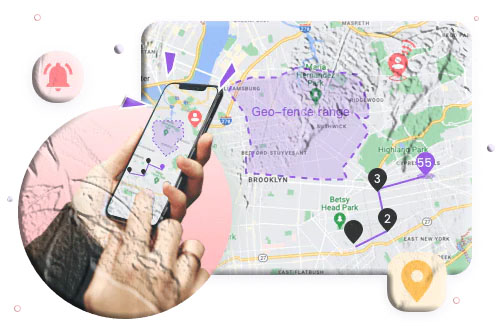
MobileTracking Parental Control is a parental monitoring app for Android that includes an ambient audio monitoring feature. This allows a parent to remotely activate the microphone on the child’s device and listen to the sounds in the environment around it in real time — without requiring the child to initiate any action.
How this is different from standard audio recording:
Standard audio recording captures audio for later playback. MobileTracking’s ambient monitoring streams audio live to the parent’s device as it is happening. This is designed for safety situations — a parent who receives a geofence alert indicating a child has left school at an unexpected time, or who sees the phone is in an unusual location and wants to assess what is happening before calling, can activate ambient listening to hear the context around the phone before deciding how to respond.
Additional features beyond ambient audio:
MobileTracking provides a comprehensive parental monitoring suite alongside the audio feature:
- Real-time GPS location with 30-day route history
- Geofencing alerts when the child’s phone enters or leaves designated areas
- Low-battery alerts that include the child’s current GPS coordinates
- Screen mirroring to see the child’s phone screen in real time
- SMS and notification monitoring with keyword alerts
- App usage tracking and app scheduling/blocking
- Remote camera access to see the environment around the phone visually
How to set it up:
Step 1: Download MobileTracking Parental Control from the Google Play Store on your own phone. Create an account and log in.
Step 2: On the child’s Android phone, install the MobileTracking Kids companion app.
Step 3: Open MobileTracking Kids, enter the pairing code shown in your parent dashboard, and complete the permissions setup.
Step 4: From your parent dashboard, tap One-Way Audio or Surround (the label may vary by version) to activate live ambient audio listening. The stream begins after a few seconds of connection establishment.
As with any parental monitoring tool, transparent use — informing your child that monitoring features are in place — tends to produce better safety outcomes than fully covert surveillance.
Frequently Asked Questions
Does every Android phone have a built-in voice recorder?
Most Android phones come with some form of built-in voice recording capability, though the specific app, name, and features vary significantly by manufacturer. Samsung devices have the Voice Recorder app; Google Pixel devices have the Recorder app. For devices without a built-in option or with a limited one, the Google Recorder app is available on the Play Store for most Android versions.
How do I record a phone call on Android?
Some Android devices — particularly Samsung Galaxy phones and Google Pixel phones in certain regions — have built-in call recording accessible through the Phone app’s in-call menu. During a call, tap the three-dot menu and look for a “Record call” option. If this is not available on your device, third-party call recording apps like Cube ACR may work on your device, though Android 10+ restrictions have reduced third-party call recording reliability. Always inform the other party before recording a call — legal requirements vary by location.
Why can’t I record internal audio directly on Android?
Android introduced restrictions on third-party app access to the internal audio mixer in Android 10, primarily for privacy and copyright protection reasons. Without system-level permissions, apps cannot directly capture audio from other apps running simultaneously. The workaround is using the built-in screen recorder, which operates at the system level and can capture device audio as an exception to this restriction.
Where are voice recordings saved on Android?
The location depends on which app was used. Samsung Voice Recorder saves files to Internal Storage > Recordings > Voice Recorder, accessible through the My Files app. Google Recorder saves to the app’s internal library and optionally to Google Drive. Third-party apps typically save to their own folder within internal storage, often named after the app. Open the Files by Google app or your phone’s built-in file manager and search for “Recordings” to find audio files if you are unsure of the location.
What is the best recording quality setting for Android voice recording?
For general voice recording: 44.1kHz sample rate, 128–256kbps bitrate, M4A or MP3 format. For professional voice work or recordings you plan to edit: 48kHz sample rate, highest available bitrate, WAV format if available. For long recordings where storage space is a concern: 44.1kHz, 64–128kbps MP3. Samsung Voice Recorder’s highest setting (256kbps, 48kHz) is excellent for any voice recording purpose.
Can I use an external microphone with any Android phone?
USB-C microphones work with most Android phones running Android 5.0 and above that support USB Audio Class. 3.5mm microphones work with phones that have a 3.5mm jack with TRRS input support — many newer phones have removed this jack, requiring an adapter. Always verify compatibility with your specific model before purchasing a microphone. Some adapters do not pass microphone signals, so check reviews for your specific adapter model.
How long can I record audio on Android?
With built-in apps on most Android phones, recording length is limited primarily by available storage rather than by a time cap. The exception is older or budget devices with limited RAM, where very long recording sessions may encounter memory-related interruptions. Google Pixel’s Recorder app specifically supports up to 18 hours of continuous recording. Third-party apps like Smart Voice Recorder are also designed for extended sessions without forced interruption.
Final Thoughts
Recording audio on Android is one of those capabilities that benefits from knowing your specific scenario before choosing a method. For everyday voice memos and meeting capture, the built-in Samsung Voice Recorder or Google Recorder on Pixel are excellent tools that require no additional downloads and produce consistently good results. For internal audio capture from games, music, or other apps, the screen recorder’s device audio mode is the right approach. For professional-quality recordings that will be published or edited, a combination of Smart Voice Recorder (or another dedicated app) and an external USB-C microphone provides results that match or exceed much more expensive recording setups.
The tips for improving recording quality apply across all methods and are worth applying consistently — particularly finding a quiet space, positioning the microphone correctly, and immediately backing up any recording that matters. These habits take almost no additional time and make a significant difference in the usability of what you capture.
For parents, the Android platform’s flexibility also extends to safety monitoring features — MobileTracking’s ambient audio capability provides a remote listening option that goes beyond what standard recording apps offer, as part of a broader family safety monitoring toolkit.
Note: Call recording laws vary by location and require compliance with local regulations. Always check applicable laws before recording any phone call or conversation involving other parties.
Add comment