Recording a phone call on Android sounds like it should be simple — press a button, capture the conversation, done. In practice, it is a little more complicated than that. The availability of built-in call recording varies significantly by phone model, carrier, and even country. Legal requirements differ dramatically depending on where you live. And the settings menus that control recording features are buried in places most people never look.
But the good news is that Android is one of the most flexible mobile platforms available, and there are multiple reliable ways to record calls — with and without additional apps, with and without built-in support. Whether you are using a flagship Samsung Galaxy, a Google Pixel, a mid-range device from OnePlus or Xiaomi, or anything in between, there is a method here that works for your situation.
This guide covers every practical approach to call recording on Android: using the native Phone app where it is available, using the screen recorder as a creative workaround, using Google Voice for VoIP-based recording, using external hardware, and using dedicated third-party apps. We also cover the legal landscape — which matters far more for call recording than it does for most other phone features — and include a section on how parents can use ambient audio monitoring to keep children safe.
By the end, you will know exactly which method suits your device and your needs, how to set it up, and what to watch out for along the way.
Before You Record: Understanding the Legal Landscape
Call recording is not a gray area legally — but the rules vary enormously depending on where you are, and getting it wrong can have serious consequences. Before using any of the methods below, it is worth understanding the framework.
One-Party Consent vs. Two-Party Consent
Most countries and U.S. states operate under a one-party consent rule. This means that as long as one person in the call is aware that it is being recorded — which, if you are the one pressing record, is you — the recording is legal. Under one-party consent, you do not need to inform the other person.
However, a significant number of jurisdictions require two-party consent (sometimes called all-party consent), meaning everyone on the call must be informed and agree to the recording before it begins. Recording a call without disclosure in a two-party consent jurisdiction can be a criminal offense — not just a civil matter.
In the United States, the following states require two-party consent: California, Delaware, Florida, Illinois, Maryland, Massachusetts, Michigan, Montana, New Hampshire, Oregon, Pennsylvania, and Washington. Several other states have nuanced rules that fall between the two categories.
Outside the United States, many countries in the European Union, Australia, Canada (depending on the province), and others have their own consent requirements that may differ significantly.
The practical advice: Before recording any call, research the laws in your state or country and in the state or country of the person you are calling. If you are in doubt, disclose the recording at the start of the call — a simple “I just want to let you know I am recording this call for my records” covers you in virtually every jurisdiction and is simply good practice.
For official legal guidance in the U.S., the Reporters Committee for Freedom of the Press maintains an up-to-date state-by-state guide to recording laws. For international guidance, consulting a local legal professional is the most reliable approach.
With the legal context established, here are the methods.
Method 1: Using the Built-In Call Recording Feature in the Phone App
The most seamless way to record calls on Android is through the native Phone app — no third-party software required, recordings saved automatically in a tidy format, and the feature integrated directly into the call interface. The challenge is that this feature is not universally available. Availability depends on three factors: the device manufacturer, the Android version, and the region.
Google Pixel phones running Android 9 or above have built-in call recording available in many regions. Samsung Galaxy devices (with One UI) also offer a call recording option in certain markets. OnePlus, Xiaomi, Realme, and several other manufacturers have included call recording in their customized Android builds. However, in regions like the European Union, Australia, and parts of the United States, manufacturers and carriers sometimes disable the feature at the software level due to local legal requirements.
If the feature is available on your device, here is how to access and configure it.
How to Enable Call Recording in the Phone App
Step 1: Open the Phone app on your Android device — the standard dialer you use to make calls.
Step 2: Tap the three-dot menu icon in the upper-right corner of the screen and select Settings.
Step 3: Scroll through the settings until you find an option labeled Call Recording, Record Calls, or something similar. If you do not see this option, it is likely not available on your device or in your region through this method.
Step 4: Inside the Call Recording settings, you will typically find several configuration options:
- Always record all calls: Toggles automatic recording for every incoming and outgoing call
- Record calls from unknown numbers: Automatically records any call from a number not in your contacts — useful for screening unexpected callers
- Record calls from selected contacts: Lets you choose specific contacts whose calls are always recorded automatically
Step 5: Choose your preferred setting and exit. From this point on, the Phone app will automatically begin recording calls according to your configuration.
How to Record a Call Manually (During a Live Call)
If you prefer to record selectively rather than automatically, you can start and stop recording during a live call.
Step 1: While on an active call, look at the on-screen controls. You may see a Record button directly in the call interface — typically represented by a red circle or a microphone icon.
Step 2: If the Record button is not visible on the main call screen, tap the three-dot menu during the call and look for Record call in the dropdown options.
Step 3: Tap Record to begin. A visual indicator — usually a red dot or a timer — will appear on screen to confirm that recording is active. In some regions, an automated voice announcement will notify both parties that recording has started.
Step 4: To stop recording, tap the record button again or select Stop recording from the menu. The recording will be saved automatically.
How to Find and Play Your Recordings
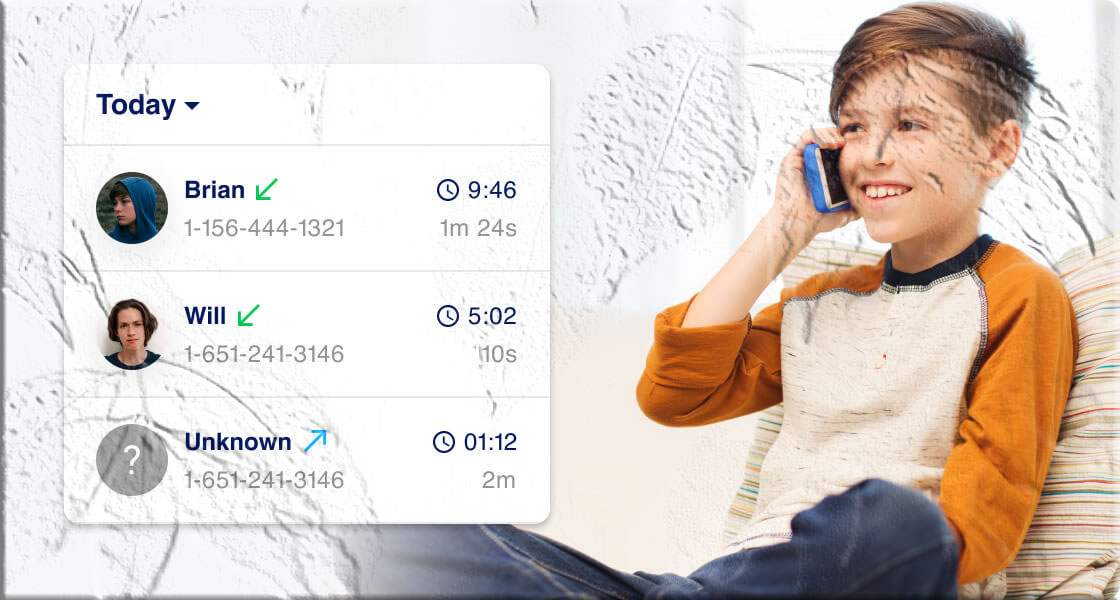
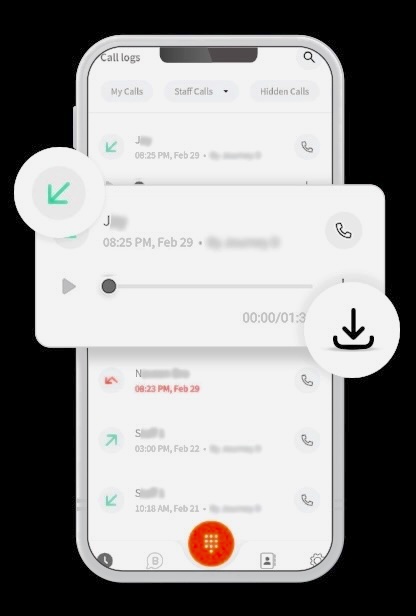
Recordings made through the native Phone app are typically saved in one of two places: within the Phone app itself (accessible through the Recents or Call History tab), or in a dedicated folder in internal storage. To find them through the Phone app, open Recents, locate the recorded call in your history, and look for a Play button next to the call details. Tap it to listen.
Alternatively, open the Files app (or My Files on Samsung), navigate to Internal Storage, and look for a folder named Recordings, Call Recordings, or PhoneRecord. Recordings are typically saved as MP3 or M4A files that you can play, share, or move like any other audio file.
Method 2: Using Android’s Built-In Screen Recorder
This is a creative workaround that many people overlook. Android’s screen recording feature — which became a standard system-level tool in Android 10 and is available on virtually all modern Android phones — can capture audio from both the microphone and the phone’s internal speakers simultaneously. During a phone call, this means it can record both sides of the conversation without requiring a dedicated call recording app.
The key is enabling microphone input in the screen recording settings before starting, since screen recording without microphone audio will only capture sounds played through the phone’s speaker.
How to Record a Call Using Screen Recording
Step 1: Swipe down from the top of your screen to open the Quick Settings panel. On most Android devices, this requires swiping down twice or using two fingers.
Step 2: Look for a Screen Record or Screen Recorder tile in the Quick Settings panel. If you do not see it, tap the pencil/edit icon to customize your Quick Settings tiles and drag Screen Record into the active panel.
Step 3: Before starting the screen recording, configure the audio settings. When you tap the Screen Record tile, you should see options for audio source — typically No audio, Media audio, or Media audio + Microphone. Select Media audio + Microphone to capture both the call audio and your voice.
Step 4: With audio configured, tap Start. A brief countdown will appear, after which the recording begins. You will see a recording indicator (usually a red dot or a toolbar) at the top of your screen.
Step 5: Make or receive your phone call. The screen recording will capture the audio of both sides of the conversation as the call plays through the phone.
Step 6: When the call ends, stop the screen recording by tapping the indicator at the top of the screen or pulling down the notification shade and tapping Stop Recording.
Step 7: The recording is saved automatically to your Gallery or to a Screen Recordings folder in your Files app.
Important note on audio quality: Screen recording captures call audio through the phone’s speaker — which means speaker volume affects recording quality. If you take calls with the speaker on maximum volume, recordings tend to be clearer. If your phone’s earpiece is pressed against your face during the call, the speaker volume may be low and audio quality will suffer. For best results with this method, use speakerphone mode during calls you plan to record.
Method 3: Using Google Voice
Google Voice is a free service from Google that gives you a dedicated phone number and routes calls through your internet connection using VoIP (Voice over Internet Protocol) technology. It is designed for people who want a second number, a unified number across devices, or a calling solution that works from phones, tablets, and computers simultaneously.
For call recording purposes, Google Voice has one particularly useful feature: it can record incoming calls natively, and the process is simple and consistent across all devices because it happens at the service level rather than the device level. This means it works regardless of your phone model, Android version, or region.
The significant limitation is that Google Voice currently only supports recording of incoming calls — outgoing calls cannot be recorded through this feature. For situations where you primarily need to record calls made to you (customer service calls, business inquiries, important follow-ups), this is a clean and free solution.
How to Set Up Call Recording in Google Voice
Step 1: If you do not already have a Google Voice account, visit voice.google.com and set one up using your existing Google account. The service is free in the United States; availability varies in other countries.
Step 2: Download the Google Voice app from the Google Play Store and sign in.
Step 3: Open the Google Voice app, tap the menu icon (three horizontal lines) in the upper-left corner, and go to Settings.
Step 4: Scroll to the Calls section and find Incoming call options. Toggle this on.
Step 5: With incoming call options enabled, the next time you receive a call through your Google Voice number, press the 4 key on your keypad while the call is live to begin recording. An automated announcement will play to both parties indicating that recording has started — this is by design and cannot be disabled, making Google Voice one of the more legally transparent call recording options available.
Step 6: To stop recording, press 4 again or simply end the call.
Finding Your Google Voice Recordings
Recordings made through Google Voice are stored in your Google Voice account, not on your device. To access them, open the Google Voice app, go to your Voicemail section, or visit voice.google.com from a browser. Recordings will appear alongside your call history and can be played, downloaded, or deleted from there. They are also searchable through Google’s interface, which makes finding a specific recording straightforward even if you have many.
Method 4: Using an External Device or Microphone
For situations where software-based recording is not available, not reliable, or not legally transparent enough for your needs, recording a call using external hardware is a straightforward alternative. This method requires a second device — either a digital voice recorder, another phone, or a laptop — positioned near the speaker.
The obvious advantage is simplicity and reliability: you are not depending on any app or software setting, and the recording exists independently of the phone being used for the call. The disadvantage is that audio quality is affected by ambient noise, distance, and speaker volume, and the setup requires a bit of physical preparation.
Using a Dedicated Voice Recorder
Digital voice recorders are small, inexpensive devices available from electronics retailers and platforms like Amazon. A basic model with a sensitive microphone is sufficient for this purpose.
Step 1: Position the voice recorder close to your phone’s speaker — ideally resting on the table next to the phone while it is on speakerphone, or held near the earpiece.
Step 2: Start recording on the voice recorder before making or answering the call.
Step 3: Make or receive the call with your phone on speakerphone for best audio capture.
Step 4: Stop the recorder when the call ends. Transfer the file to your computer or phone using the recorder’s USB cable or memory card.
Using Another Phone as a Recorder
If you have a second smartphone available, the Google Recorder app (available on Pixel phones and some Android devices) or any standard voice recorder app can serve as the recording device.
Step 1: Open a voice recording app on the second device.
Step 2: Place the second device next to the phone being used for the call, positioned near the speaker.
Step 3: Start recording on the second device and then make or receive the call on the primary phone.
Step 4: Stop the recording when the call ends and save the file.
This method does not notify the other party in any way, which makes it a common approach for people who need to record discreetly. However, the legal obligation to disclose in two-party consent jurisdictions still applies regardless of the recording method used.
Method 5: Top Third-Party Call Recording Apps for Android
If the built-in phone app does not support recording on your device and the screen recording workaround feels clunky, the Google Play Store offers a well-established selection of dedicated call recording apps. These range from straightforward automatic recorders to advanced tools that handle VoIP calls from WhatsApp, Skype, and similar platforms.
Here is a look at three of the most reliable options currently available.
1. Automatic Call Recorder Pro
Automatic Call Recorder Pro is one of the most downloaded call recording apps on Android, and its longevity is a reasonable indicator of reliability. As the name suggests, its primary selling point is automation — once configured, it records every incoming and outgoing call without requiring you to remember to start it manually.
What it does well:
The app records calls in multiple formats, including MP3 and other audio formats, and allows you to configure format and quality settings to balance file size against audio clarity. Recordings can be password-protected, shared directly from the app, and played back through either the speaker or earpiece. For users who want to automatically send call references to email — for business record-keeping, for example — the app supports that too.
Configuration:
After installing from the Play Store, open the app and go through the initial setup, which takes about two minutes. Grant it the permissions it needs — phone, storage, and microphone. From the main settings, you can enable automatic recording for all calls or configure rules based on contact type (all contacts, specific contacts, or unknown numbers only). Recordings appear in the app’s main library, organized by date and contact name.
Important note: Like all call recording apps on Android 10 and above, Automatic Call Recorder Pro is subject to API restrictions that Google introduced in 2019 affecting how apps can capture call audio. The degree to which these restrictions affect recording quality or availability varies by device. The app works most reliably on devices where the manufacturer has not implemented additional restrictions on call audio access.
2. Cube ACR
Cube ACR takes a broader approach to call recording by supporting not just regular phone calls but also VoIP calls through apps like WhatsApp, Telegram, Viber, Skype, and other communication platforms. This makes it particularly useful in an era when a growing proportion of personal and professional calls happen through internet-based services rather than the traditional cellular network.
What it does well:
Cube ACR runs as a persistent background service and automatically detects when supported apps are handling a call — triggering recording without any manual input. The free version provides core recording functionality. The premium tier adds cloud storage sync, a PIN lock for the recordings library, automatic deletion rules (e.g., delete recordings older than 30 days automatically), and integration with additional VoIP platforms.
Configuration:
Install from the Play Store, launch the app, and grant the required permissions. The app will display a floating button overlay when supported apps are detected during a call — tapping it allows manual control over recording if you prefer that to full automation. VoIP call recording quality depends on the platform, but Cube ACR is generally considered one of the most reliable options for this use case.
3. ACR Phone
ACR Phone distinguishes itself from straightforward recording apps by combining call recording with a broader call management feature set. Beyond capturing audio, it includes spam call blocking (so you can screen and block unwanted callers), call announcement (which reads out the caller’s name or number before you answer), and privacy management tools.
What it does well:
Cloud backup is a standout feature — recordings can be automatically synced to Google Drive or Dropbox, which means your archive does not take up local storage and is accessible from any device. The search functionality is excellent: you can find a specific recording by contact name, phone number, or notes you have added manually to call records. For business users who keep detailed call logs, this searchable approach to record-keeping is genuinely useful.
Configuration:
After installing from the Play Store, set up your preferred cloud storage integration in the Settings menu. Enable automatic recording for all calls or configure it per-contact. The app also allows you to set up notes for specific contacts that appear as prompts before recording begins — useful if you want to annotate context before a call starts.
Bonus: Monitoring a Child’s Phone Surroundings Remotely
So far, this article has focused on recording your own phone calls. But there is a closely related use case that parents frequently ask about: monitoring what is happening around a child’s phone in real time, without necessarily recording a specific call.
This is particularly relevant when a child is out of sight — at school, at a friend’s house, traveling — and a parent wants to verify that everything is okay without making a phone call that the child might feel is intrusive or embarrassing.
MobileTracking Parental Control
MobileTracking Parental Control is a parental monitoring app designed specifically for this kind of family safety use case. Among its features is a surrounding audio monitoring function — sometimes called ambient listening — that allows a parent to remotely activate the microphone on a child’s Android phone and listen to the sounds in the environment around the device in real time.
This is not the same as recording a phone call. It does not capture a conversation between two specific people on a call. Instead, it streams the ambient audio from the child’s surroundings — background voices, environmental noise, what is happening in the room — so that a parent can assess whether everything seems normal without needing to be physically present.
How it works in practice:
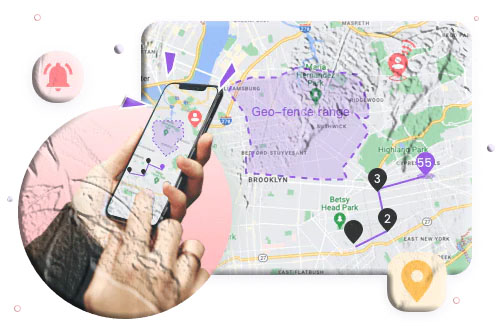
If a parent receives a geofence alert indicating a child has left school at an unexpected time, or if the low-battery alert fires from a location that does not match expectations, the parent can open the MobileTracking app and activate ambient audio to listen to what is happening around the phone before deciding how to respond. This provides context before escalating to a phone call, which might embarrass a child in front of friends or alert them to the fact that monitoring is in place.
Beyond ambient audio, MobileTracking offers a broad suite of parental monitoring features:
- Real-time GPS location with live map view and 30-day route history
- Geofencing with instant alerts for zone entries and exits
- Screen mirroring to view the child’s screen content in real time
- SMS and call monitoring with keyword detection for flagged words in incoming messages
- App usage monitoring and screen time management
- Low-battery alerts with current GPS location attached
- Stealth mode that hides the app icon on the child’s device
How to set it up:
Step 1: Download and install MobileTracking Parental Control from the Google Play Store on your own phone and create an account.
Step 2: On your child’s Android phone, install the companion MobileTracking Kids app.
Step 3: Open MobileTracking Kids on the child’s phone, enter the pairing code shown in your parent dashboard, and complete the permission setup.
Step 4: Once paired, open your parent dashboard and look for the Surround or Ambient monitoring option to begin real-time audio listening. Other monitoring features are available from the same dashboard.
As with all parental monitoring tools, transparent use — telling your child that the app is installed and explaining why — tends to produce the best outcomes. Children who feel monitored without explanation can become resentful; children who understand the safety rationale tend to accept it as a reasonable part of family life, especially at younger ages.
Where Are Call Recordings Saved on Android?
If you are trying to find a recording that was saved automatically and you are not sure where to look, the answer depends on which method was used to create it.
Recordings from the native Phone app are usually found in one of two places: within the Phone app itself (under Recents or Call History, where a play button appears next to recorded calls), or in a folder in internal storage named Recordings, Call Recordings, or PhoneRecord. On Samsung devices, recordings are also accessible through the Voice Recorder app under a Call Recordings tab.
Recordings from the Screen Recorder are saved to your Gallery or to a folder named Screen Recordings in the Files app.
Google Voice recordings are stored in your Google Voice account online, accessible at voice.google.com or through the Google Voice app.
Recordings from third-party apps like Automatic Call Recorder Pro or ACR Phone are saved within the app’s own library and also stored as audio files (MP3 or M4A) in the device’s internal storage, typically in a folder named after the app. Open the Files app, search for “recording” if you cannot find the folder directly, and look for MP3 or M4A files with timestamps matching your calls.
Tips for Better Call Recording Quality on Android
Recording the call is one thing; getting a recording that is actually clear and usable is another. Here are practical tips that improve audio quality across all methods.
Use speakerphone when possible. Most recording methods — including screen recording and external devices — capture audio more effectively when the phone is on speakerphone and sound is coming from the phone’s speaker rather than the earpiece pressed against your face. The difference in recorded audio quality is significant.
Reduce background noise. Call recordings pick up ambient noise from your environment in addition to the call audio. Taking calls you intend to record in a quiet space — away from traffic, appliances, or other people talking — produces noticeably cleaner recordings.
Keep the phone still. Handling noise — the rustling of fabric or tapping sounds when you move the phone — is one of the most common sources of audio interference in call recordings. If you are recording with an external device, place both devices on a stable surface.
Check storage before long recording sessions. Audio files are generally small, but if you are recording long calls or have automatic recording enabled for all calls, storage consumption adds up over time. Periodically check your recordings folder and archive or delete older files you no longer need.
Test your setup before an important call. If you are recording a call for legal, business, or archival reasons and accuracy matters, do a short test recording first — call a friend or make a brief internal call — and play it back to confirm audio quality is acceptable before relying on the same setup for the real thing.
Back up important recordings. Phone storage can be lost through resets, updates, or device failure. Any recording that matters should be backed up to cloud storage (Google Drive, Google Photos, or Dropbox) or transferred to a computer promptly after creation.
Frequently Asked Questions
Can you record a phone call while on the phone?
Yes. On Android devices that support it, tap the three-dot menu during an active call and select Record call. Some devices display a record button directly on the call screen. If your device’s Phone app does not offer this option, you can start Android’s Screen Recorder before or during the call, use Google Voice (for incoming calls), or use a separate device positioned near the speaker.
How do you record a phone call on a Samsung Galaxy?
Open the Phone app and initiate or receive a call. During the call, tap the three-dot menu in the upper-right corner and select Record call. A confirmation prompt may appear — tap Start recording. The recording indicator will appear on screen. To stop, tap the three-dot menu again and select Stop recording. Recordings are saved under Recents in the Phone app or in the Voice Recorder app under the Call Recordings tab.
How do I record a live call on Android without an app?
Use the built-in Screen Recorder. Pull down the Quick Settings panel, tap Screen Record, select Media audio + Microphone as the audio source, and tap Start before or during the call. This works without installing any third-party app and is available on most Android devices running Android 10 or above.
What is the best call recording app for Android?
It depends on your use case. For automatic recording of all standard calls, Automatic Call Recorder Pro is widely used and reliable. For VoIP calls through WhatsApp, Skype, or similar apps, Cube ACR handles the widest range of platforms. For a combined call recording and call management solution with cloud backup, ACR Phone is a strong choice. All three are available on the Google Play Store.
Is call recording legal on Android?
It depends on your location. Countries and U.S. states vary between one-party consent (only you need to know) and two-party consent (everyone must agree). California, Florida, Illinois, and several other U.S. states require all-party consent. When in doubt, disclose the recording at the start of the call. See the Reporters Committee for Freedom of the Press for a state-by-state breakdown.
How do I enable automatic call recording on Android?
Open the Phone app, tap the three-dot menu, select Settings, and look for Call Recording or Record Calls. Toggle on Automatic Call Recording and configure whether to record all calls, calls from unknown numbers, or calls from specific contacts. If this option is not present in your Phone app, your device or region may not support native call recording, and a third-party app is the next step.
Where are call recordings stored on Android?
Native Phone app recordings are found under Recents in the Phone app (look for a play icon next to recorded calls) or in a folder called Recordings or Call Recordings in your internal storage. Third-party app recordings are stored in that app’s internal folder — typically accessible through the Files app. Google Voice recordings are stored in your Google Voice account online.
Can I record WhatsApp or Telegram calls on Android?
Standard Android recording methods do not work reliably for VoIP calls through apps like WhatsApp or Telegram, because these apps route audio differently from cellular calls. Cube ACR is specifically designed to handle VoIP call recording and supports WhatsApp, Telegram, Viber, Skype, and others. It is the most reliable option for recording calls through these platforms.
Does Google Voice record calls automatically?
No — Google Voice does not record calls automatically. You must manually press the 4 key during a live call to start recording. An announcement is made to all parties when recording begins, which cannot be disabled. Recorded calls are stored in your Google Voice account, not on the device.
How do I delete recorded calls on Android?
For recordings in the native Phone app, open the call in Recents, tap the recording, and use the delete option in the playback interface. For Files-based recordings, open the Files app, navigate to the recordings folder, and delete the files as you would any other file. For third-party app recordings, use the delete function within the app’s library. For Google Voice, delete recordings from your Google Voice account at voice.google.com.
Final Thoughts
Recording a phone call on Android is straightforward once you know which method fits your device and situation. The native Phone app offers the cleanest experience when it is available — automatic recording, organized playback, no extra software. The Screen Recorder workaround fills the gap on devices where the Phone app does not support recording natively. Google Voice is a reliable and legally transparent option for incoming calls. External hardware is foolproof but requires preparation. And dedicated apps like Cube ACR and Automatic Call Recorder Pro extend recording capabilities to virtually any situation, including VoIP calls that the built-in tools cannot handle.
For parents, the surrounding audio monitoring feature in apps like MobileTracking Parental Control offers a different kind of recording capability — one focused on ambient awareness and child safety rather than call capture. It is a practical tool for the specific concern of knowing what is happening around a child’s phone when they are out of reach.
Whatever your reason for recording — logging a business agreement, documenting a customer service call, keeping a personal record, or maintaining oversight of a child’s safety — the most important step is always to check the legal requirements in your jurisdiction before pressing record. The technology is straightforward; the responsibility for using it correctly is yours.
Disclaimer: This article is for informational purposes only. Call recording laws vary significantly by jurisdiction. Always ensure you comply with applicable local, state, and national laws before recording any phone call.
Add comment