Screen recording has gone from a niche power-user feature to something millions of people use every single day. Whether you are a teacher putting together a tutorial, a gamer capturing a highlight clip, a parent showing a child how to use an app, or someone trying to document a bug for tech support — being able to record exactly what is happening on your phone screen is genuinely useful. And on Samsung Galaxy phones, it is easier than most people realize.
Samsung has built a fully featured screen recorder directly into its One UI operating system. That means no downloading, no third-party subscriptions, no watermarks — just a built-in tool that works reliably across nearly every Galaxy device released in the past several years. But because Samsung’s interface layers quick settings, advanced settings, and different entry points depending on your device, a lot of people struggle to find the feature or get it configured the way they want.
This guide covers everything you need to know about screen recording on Samsung — from confirming whether your specific model supports the feature, to customizing audio and video quality, to using Game Launcher for capturing gameplay, to exploring the best third-party screen recorder apps if you need something beyond what the built-in tool offers. By the end, you will know how to start, pause, stop, find, and share your recordings with confidence.
Which Samsung Models Support Screen Recording?
Before anything else, it is worth confirming that your device supports the native Samsung screen recorder. The good news is that the feature is very broadly available.
Samsung’s built-in screen recorder was introduced as part of the One UI update that shipped with the Galaxy Note 10 lineup and was simultaneously pushed to other Galaxy devices via a software update. The key requirement is that the phone must be running Android 9 Pie or higher with Samsung One UI. In practice, this covers the vast majority of Samsung phones currently in use.
Here is a quick breakdown of supported device families:
Samsung Galaxy S series: Galaxy S8, S8+, S9, S9+, S10, S10+, S10e, S20, S20+, S20 Ultra, S21, S21+, S21 Ultra, S22, S22+, S22 Ultra, and all subsequent S-series releases.
Samsung Galaxy A series: Galaxy A10, A20, A30, A40, A50, A51, A52, A70, A71, A72, A80, and all subsequent A-series phones that received Android 9 Pie or later.
Samsung Galaxy Note series: Galaxy Note 8, Note 9, Note 10, Note 10+, Note 20, Note 20 Ultra.
Samsung Galaxy Z series: Galaxy Z Fold and Z Flip devices across all generations.
Important exception: Some apps — most notably streaming platforms like Netflix, Disney+, and certain banking or financial apps — block screen recording at the application level as a copyright or security protection. If you start a recording and the video file comes out black when you try to play it back from inside one of these apps, that is why. The screen recorder itself is working fine; the app is actively preventing its content from being captured.
If your phone is running Android 9 or above and you still cannot find the screen recorder in your quick settings panel, it is likely just hidden — which the next section explains how to fix.
Method 1: Using Samsung’s Built-In Screen Recorder
This is the fastest and most accessible method. Samsung’s native screen recorder lives inside the Quick Settings panel — the expanded control center you access by swiping down from the top of the screen. Here is how to find it, add it if it is missing, and use it effectively.
Step 1: Access the Quick Settings Panel
Swipe down from the top of your Samsung’s screen once to open the notification shade. Then swipe down a second time (or use two fingers in a single swipe) to fully expand the Quick Settings panel, which shows all your toggles — Wi-Fi, Bluetooth, Brightness, Do Not Disturb, and so on.
Scroll sideways through the Quick Settings tiles. Look for a tile that says Screen Recorder with a video camera icon. If you see it, you can skip straight to Step 3.
Step 2: Add Screen Recorder to Quick Settings (If Missing)
If Screen Recorder is not visible in your Quick Settings panel, it just needs to be added. It is not missing from the phone — it is simply not pinned to the panel yet.
Step 2a: In the Quick Settings panel, look for a pencil icon (edit button) in the lower-left corner of the panel. Tap it. On some Samsung models, you may first need to tap a three-dot menu icon and then select Button Order or Edit buttons.
Step 2b: You will see two sections — the tiles currently active in your Quick Settings, and a row of available tiles below. Scroll through the available tiles until you find Screen Recorder.
Step 2c: Press and hold the Screen Recorder tile, then drag it up into the active Quick Settings area. Place it wherever you like in the arrangement.
Step 2d: Tap the back arrow or tap Done to save your changes. The Screen Recorder tile will now appear in your Quick Settings panel every time you expand it.
Step 3: Start a Screen Recording
Tap the Screen Recorder tile in Quick Settings. Before recording begins, Samsung will display a brief prompt asking you to configure two things:
Sound settings: You can choose to record with no sound, record with media sound only (capturing audio playing through the phone’s speakers), or record with media sound plus microphone (capturing both the phone’s audio and your voice through the microphone). For tutorials and gaming content, the media plus microphone option is usually the most useful. For silent walkthroughs or demonstrations, no sound keeps the file size smaller.
Show touches on screen: Toggling this on adds a visual circle that highlights wherever your finger taps. This is particularly helpful for tutorial recordings where you want viewers to clearly see what you are tapping.
Once you have made your selections, tap Start. A three-second countdown will appear, giving you time to navigate to the right app or screen before recording begins. The recording indicator — a small toolbar at the top of the screen — will appear once it starts.
Step 4: During the Recording
While recording, a small toolbar appears at the top of the screen. Depending on your Samsung model and One UI version, this toolbar may include:
- A pause button to temporarily halt the recording without ending it
- A stop button to end the recording entirely
- A selfie camera button that activates a small picture-in-picture window showing your front camera feed — useful for reaction-style videos or tutorials where you want your face visible
- A drawing tool that lets you annotate directly on the screen with your finger while recording
Step 5: Stop and Find Your Recording
When you are finished, tap the stop button in the toolbar. The recording will be saved automatically to your phone’s gallery. To find it, open the Gallery app, go to Albums, and look for the Screen Recordings album. Alternatively, open My Files, tap Videos, and navigate to the Screen Recordings folder.
Method 2: Customizing Your Screen Recorder Settings
Samsung’s screen recorder has more customization options than most people ever explore. There are two places to access these settings — through Quick Settings for a fast adjustment, or through the main Settings app for the full range of options.
Customizing Through Quick Settings
Step 1: Swipe down twice to open Quick Settings. Long-press the Screen Recorder tile (rather than just tapping it). This opens the Screen Recorder settings menu directly.
Step 2: From here, you can adjust the video quality — typically available in options like 480p, 720p, and 1080p — and the audio source. Select your preferences and tap Done.
This is the quickest route for making a fast adjustment before a recording session.
Customizing Through the Settings App
Step 1: Open the Settings app from your home screen or app drawer.
Step 2: Scroll down and tap Advanced Features.
Step 3: Tap Screenshots and Screen Recorder.
Step 4: Tap Screen Recorder Settings (the exact label may vary slightly by One UI version).
Step 5: From here, you can configure the following:
- Sound: Choose between no sound, media sound, or media sound with microphone input
- Video quality: Options typically include 480p, 720p, and 1080p — higher resolution produces a sharper recording but also a larger file
- Selfie video size: If you use the selfie camera overlay feature during recordings, this setting controls how large that picture-in-picture window appears on the screen — Small, Medium, or Large
For most casual recordings, 720p with media sound is a good balanced setting. For content you plan to share publicly or edit further, 1080p is worth the extra storage space.
Method 3: Screen Recording Through Game Launcher
Samsung’s Game Launcher is a hub application that comes pre-installed on most Galaxy devices. It is designed to improve the gaming experience by organizing all your installed games in one place and providing tools like notifications blocking, performance optimization, and — most relevant here — a dedicated screen recording function.
The interesting thing about Game Launcher’s screen recorder is that it does not have to be used exclusively for games. You can manually add any app to the Game Launcher library, which then allows you to use Game Launcher’s recording tools from within that app. This makes it a flexible option for recording content from apps that might not work as smoothly with the standard screen recorder.
Step 1: Open Game Launcher
Find and tap Game Launcher in your app drawer or on your home screen. If it is not installed, you can enable it by going to Settings > Advanced Features > Game Launcher and toggling it on. Once enabled, it will appear in your app drawer.
Step 2: Add the App You Want to Record
Inside Game Launcher, swipe up from the bottom of the screen to expand the game library panel. Tap the three vertical dots in the upper-right corner of the library and select Add Apps. This brings up a list of all apps installed on your phone.
Find the app you want to record in the list and tap it to select it, then tap Add in the upper right. The app is now part of your Game Launcher library, and Game Launcher’s tools — including screen recording — will be available when you run it from this screen.
Step 3: Launch the App and Start Recording
Back in the Game Launcher library, tap the app you just added to launch it through Game Launcher. Once the app is running, look for the Game Tools button — it appears as a small floating icon, usually in the lower-left corner of the screen. Tap it.
From the Game Tools overlay, you will see several options. Tap Record to begin capturing your screen. The recording will start immediately with a visible indicator at the top of the screen.
Step 4: Stop the Recording
When you are done, tap the Game Tools button again and select Stop Recording, or use the stop icon in the recording toolbar at the top of the screen. Your recording will be saved to the Gallery in the Screen Recordings album, just like a standard screen recording.
After stopping, Game Launcher also gives you the option to Watch Recorded Video immediately, which is handy for quickly reviewing your footage before deciding whether to keep or delete it.
Method 4: Best Third-Party Screen Recorder Apps for Samsung
Samsung’s built-in recorder handles most situations well, but there are cases where a third-party app fills a genuine gap — more editing options, longer recordings, annotation tools, or parental monitoring features. Below are four well-regarded options available for Samsung Galaxy devices.
1. MobileTracking Parental Control
For parents, screen recording takes on a different meaning. The goal is not to capture your own screen activity — it is to see what is happening on your child’s phone in real time, even when they are not with you. MobileTracking Parental Control addresses this directly with a Screen Mirroring feature that lets you view the live display of your child’s Samsung device from your own phone or a web dashboard.
This is meaningfully different from a standard screen recorder. Rather than generating a video file that you review later, Screen Mirroring streams the child’s display to you as it happens — so you can see what apps they are using, what websites they are visiting, and what messages they are sending in real time. If something concerning appears, you can act immediately rather than discovering it hours later.
Beyond screen mirroring, MobileTracking offers a broader set of monitoring tools that many parents find useful alongside the visual monitoring:
- App management: See which apps are installed and how much time is spent in each one. Block apps that are not age-appropriate.
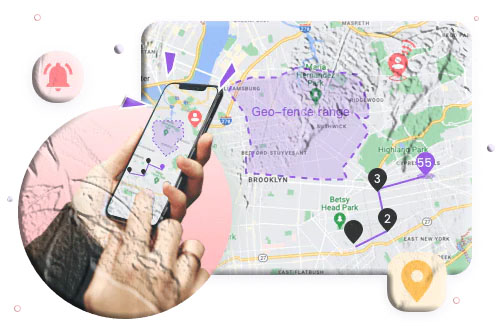
- Location tracking: View your child’s real-time GPS location and access up to 30 days of location history.
- SMS and call monitoring: Review incoming and outgoing messages, with keyword detection that sends an alert if specific words appear in texts.
- Safe zone alerts: Set geographic boundaries and receive notifications when your child enters or leaves a designated area.
- Surrounding audio monitoring: Activate the phone’s microphone remotely to hear what is happening around the device.
How to set it up:
Step 1: Download and install MobileTracking Parental Control from the Google Play Store on your own phone. Create an account and log in.
Step 2: On your child’s Samsung phone, download and install MobileTracking Kids — the companion app.
Step 3: Open MobileTracking Kids on your child’s device and enter the pairing code displayed in your parent app to link the two devices.
Step 4: Complete the permission setup on the child’s device, granting the app access to the features you want to monitor.
Step 5: From your parent dashboard, tap the Screen Mirroring icon to begin viewing your child’s screen live. All monitoring happens quietly in the background on the child’s device.
This is particularly useful for parents of younger children who are just beginning to use smartphones independently, or for families navigating concerns about online safety.
2. AZ Screen Recorder
AZ Screen Recorder is one of the most consistently well-reviewed screen recording apps for Android. It has been around for years and has earned a strong reputation for reliability — it records at high quality for extended periods without stuttering, overheating the phone, or crashing unexpectedly. The interface is clean and stays out of your way during recordings.
One of AZ Screen Recorder’s strengths is the level of control it gives you over recording quality. You can fine-tune the video resolution, frame rate, and bit rate independently — something Samsung’s native recorder does not allow. This makes it a good choice for content creators who have specific quality requirements or who are recording for upload to YouTube, social platforms, or video editing software.
Key features:
- No watermark on recorded videos (free version)
- No time limit on recordings
- Adjustable resolution (up to 1080p and beyond on supported devices), frame rate (up to 60fps), and bit rate
- Built-in video trimming and editing tools
- Front camera overlay (picture-in-picture)
- Facecam and drawing/annotation support
How to use AZ Screen Recorder:
Step 1: Install AZ Screen Recorder from the Google Play Store. When you first launch the app, grant it the permissions it requests — overlay permission (to display the floating control bubble), storage access, and microphone access if you plan to record audio.
Step 2: Tap the gear icon within the app to open Settings. Adjust the video resolution, frame rate, and bit rate to match your needs. For general use, 1080p at 30fps is a solid starting point. For gaming content, 60fps produces smoother results.
Step 3: Exit the Settings menu. AZ Screen Recorder places a small floating bubble on your screen. Navigate to the app or screen you want to record, then tap the bubble and press the red record button to begin.
Step 4: When you are done, pull down the notification shade and tap Stop Recording, or tap the bubble again and press the stop icon. Your video is saved to your gallery.
AZ Screen Recorder is free with optional in-app purchases to unlock a pro version that adds additional features like scheduled recordings and higher resolution options.
3. InShot Screen Recorder
InShot is primarily known as a video editing app, but its screen recorder is a capable standalone tool as well. What makes InShot’s screen recorder worth considering is the combination of recording and editing in a single app — you can capture your screen and then immediately clean up the footage, add music, trim sections, apply text or stickers, and export a polished final video without switching between multiple applications.
For content creators who plan to publish their recordings — tutorials, how-to videos, social media clips — having editing tools immediately at hand after a recording session saves a meaningful amount of time.
Key features:
- No watermark on recorded videos
- Built-in professional-grade video editor
- Audio recording from microphone or internal audio
- Screen annotation and touch visualization during recording
- Easy export to social platforms directly from the app
How to use InShot Screen Recorder:
Step 1: Download and install the InShot Screen Recorder from the Google Play Store. Open the app and grant the required permissions.
Step 2: Tap the settings/gear icon to configure your recording preferences — resolution, frame rate, and audio source. Adjust these to suit the content you are planning to capture.
Step 3: Tap Record and navigate to the app or screen you want to capture. InShot will display a small floating control button on screen. Tap it to start the recording.
Step 4: When you are finished, tap the control button again and select Stop. The app will bring you directly into its editing suite where you can trim, cut, add audio, and export the final video.
InShot Screen Recorder is free to download, with optional in-app purchases for premium editing features and additional export options.
4. Google Play Games Screen Recorder (For Gaming)
If you are specifically recording gameplay and you use Google Play Games to track your achievements and progress, it is worth knowing that Google Play Games includes a built-in recording feature. It captures gameplay at up to 720p and can simultaneously record your front camera and microphone, which is ideal for Let’s Play or commentary-style content.
To use it, open Google Play Games, find the game you want to record in your library, tap the three-dot menu next to the game’s name, and select Record Gameplay. Choose your video quality and camera settings, then launch the game. Recording controls will appear as an overlay once the game starts.
This is not a general-purpose screen recorder — it only works for games tracked through the Play Games app — but for gaming content specifically, it is a clean and straightforward option that requires no additional app installation.
How to Transfer Screen Recordings to Another Device or SD Card
Once you have recorded your screen, you may want to move the file — to free up storage, share it on a computer, or back it up to an SD card. Here is how to do it.
Moving to an SD Card
Step 1: Open the My Files app on your Samsung phone.
Step 2: Navigate to Internal Storage > Videos > Screen Recordings. You will see all your saved screen recording files listed here.
Step 3: Long-press the recording you want to move to select it. You can tap additional files to select multiple at once.
Step 4: Tap Move or Copy from the options at the bottom of the screen.
Step 5: Navigate back to the My Files home screen and select SD Card. Navigate to the folder where you want to save the file and tap Move Here or Copy Here.
Transferring to a Computer
Connect your Samsung phone to your computer using a USB cable. On the phone, swipe down the notification shade and tap the USB connection notification. Select File Transfer (or MTP on some devices). Your phone will appear as an external drive on your computer. Navigate to Internal Storage > Videos > Screen Recordings and copy the files to your computer.
Alternatively, you can use Samsung Smart Switch for a managed transfer, or simply upload your recordings to Google Drive or Google Photos and access them from any device.
Tips for Better Screen Recordings on Samsung
Getting a clean, watchable recording takes a little more than just pressing the record button. Here are some practical habits that make a noticeable difference in quality.
Clear your notifications before recording. Incoming texts, calls, or app alerts can appear as banners over your screen during recording, which looks messy and may obscure important content. Before starting a long recording, enable Do Not Disturb mode from your Quick Settings panel. You can set it to allow alarm exceptions while silencing everything else.
Check your storage before long sessions. Screen recordings at 1080p generate sizable files — a ten-minute recording can easily be 200–400MB depending on screen activity and audio. Check your available storage under Settings > Battery and Device Care > Storage before any extended session. If storage is tight, either clear space first or lower your recording quality to 720p.
Use a stable surface or mount for tutorial recordings. If you are narrating while recording, even small physical movements create noise. Propping your phone on a stand or resting it flat on a desk keeps the microphone pickup consistent and prevents handling noise from appearing in the audio track.
Record in landscape for wider-format content. If you are recording for YouTube or any widescreen platform, rotate your phone to landscape orientation before starting the recording. Samsung’s screen recorder captures whatever orientation the phone is in at the time, so getting this right before you start saves you from having to rotate the video in editing later.
Trim immediately after recording. Samsung’s native gallery editor allows basic trimming. Open the recording in the Gallery app, tap Edit, and drag the trim handles to cut out the beginning countdown and any tail end you do not need. This keeps your files tidy without requiring a separate editing app.
Use a headset with an inline microphone for better audio. The Samsung phone’s built-in microphone picks up room noise easily. If you are narrating a tutorial or commentary, plugging in a wired headset with an inline microphone — even a basic pair of earbuds — gives you a microphone that is much closer to your mouth, resulting in significantly cleaner audio with less background ambience.
Lower the screen brightness to reduce battery drain. Extended screen recordings at high brightness consume battery quickly. If you are recording for more than 15 or 20 minutes, consider lowering brightness slightly — your recording quality will not be affected, but your phone will stay cooler and your battery will last longer.
Test a short clip before committing to a long recording. Before you record a 30-minute tutorial session, do a 60-second test run and play it back to check audio quality, resolution, and framing. Discovering an audio issue after a long recording is frustrating and avoidable with a quick preliminary check.
Use Airplane Mode for truly silent recordings. If even Do Not Disturb is not enough — for example, if you are concerned about emergency alerts or carrier messages interrupting — enabling Airplane Mode entirely guarantees no system interruptions. Just remember that Wi-Fi and mobile data will also be off during the recording, so any apps that rely on a live connection will not work normally.
Frequently Asked Questions
Where is the Screen Recorder on Samsung?
The Screen Recorder button lives in the Quick Settings panel. Swipe down from the top of your screen twice (or with two fingers in one swipe) to fully expand Quick Settings. Scroll through the available tiles to find Screen Recorder. If it is not visible, tap the pencil edit icon and drag Screen Recorder from the available tiles into your active panel.
How do I turn on Screen Recording on my Samsung Galaxy?
Once you have the Screen Recorder tile in your Quick Settings, simply tap it. A prompt will appear asking whether to include audio and whether to highlight taps on screen. Make your selections and tap Start. A three-second countdown will begin, after which the recording starts automatically.
Why is my screen recording showing a black screen?
This almost always means the app you are trying to record has blocked screen capture. Streaming apps like Netflix, Prime Video, Disney+, and most banking apps do this as a security or copyright measure. The screen recorder itself is working correctly — the app is actively preventing its content from being captured. There is no reliable workaround for this on unmodified Samsung devices.
How do I stop or pause a screen recording?
Look at the floating toolbar that appears at the top of the screen during a recording. Tap the pause icon to temporarily halt the recording without ending it, or tap the stop icon to end and save it. You can also pull down the notification shade and use the Screen Recorder controls shown there.
Where are my screen recordings saved on Samsung?
Recordings are saved automatically to the Screen Recordings album in the Gallery app. You can also find them through My Files > Videos > Screen Recordings.
Can I screen record on Samsung without sound?
Yes. When you tap the Screen Recorder tile in Quick Settings, the setup prompt lets you choose No audio. If you later want to change this default, go to Settings > Advanced Features > Screenshots and Screen Recorder > Screen Recorder Settings and adjust the Sound option there.
How long can I screen record on Samsung?
There is no hard time limit imposed by Samsung’s built-in recorder. The practical limit is your available storage space. At 1080p quality, a typical recording uses roughly 200–400MB per 10 minutes of screen activity. Keep an eye on your storage if you plan to record for more than 20 or 30 minutes continuously.
Can I screen record calls or video calls on Samsung?
Standard phone calls cannot be screen recorded due to call recording restrictions imposed at the Android system level in most regions. Video calls through apps like Google Meet, Zoom, or Microsoft Teams can typically be recorded (the video portion), though audio capture may vary depending on system settings. Note that recording a call without the other party’s knowledge may be illegal in your jurisdiction.
How do I add the Screen Recorder to my Samsung Quick Settings?
Swipe down twice to open Quick Settings fully, then tap the pencil/edit icon in the lower corner. In the editing view, scroll through the available tiles until you find Screen Recorder. Press and hold it, drag it up into the active tile area, and tap Done to save. The tile will appear in Quick Settings from that point forward.
Does Samsung’s screen recorder work on all Galaxy models?
It works on all Samsung Galaxy phones running Android 9 Pie or higher with One UI. This covers the Galaxy S8 and later, Galaxy A10 and later (models that received Android 9), Galaxy Note 8 and later, and all Z-series foldable devices. Older devices running Samsung Experience (the predecessor to One UI) or Android 8 or earlier do not have the native screen recorder.
Final Thoughts
Screen recording on Samsung is genuinely one of those features that, once you discover it, becomes hard to live without. The fact that it is built directly into One UI — accessible in two taps from Quick Settings — means there is almost no barrier to using it. Whether you are capturing a funny moment, creating a how-to video, documenting a software issue for technical support, or keeping an eye on your child’s device through a parental monitoring app, your Samsung phone already has the tools to do it.
The native screen recorder handles most everyday recording needs well. If you need more control over quality settings or built-in editing tools, AZ Screen Recorder and InShot are solid choices that add those capabilities without cluttering up your device. And if your primary goal is monitoring how another device is being used — particularly for parents — MobileTracking Parental Control’s Screen Mirroring feature offers a fundamentally different kind of visibility that a simple video recorder cannot replicate.
The best place to start is always with what your phone already offers. Try the built-in Samsung screen recorder first, customize the settings to suit your needs, and then consider third-party apps if you run into a specific limitation. Chances are, the built-in tool will do exactly what you need.
If you found this guide helpful, feel free to bookmark it or share it with other Samsung users who are still searching for that recording button. And if there is a scenario or question not covered here, leave a comment below — we would be happy to help.
Note: App availability and Samsung One UI features may vary by device model, region, and software version. Always ensure your Samsung phone is running the latest available software update for the best screen recording experience.
Add comment